As the world's leading CDN/WAF provider, Cloudflare seems to never charge for traffic and has always provided many free services to the public, including CDN, static page hosting (Cloudflare Pages), and Cloudflare Zero Trust, which will be introduced in this article.
As the name suggests, Cloudflare Zero Trust provides a virtual intranet across the internet in a zero-trust environment.
It securely connects devices (including servers and personal computers) scattered around the world and allows users to access the global internet through the exit gateway provided by Cloudflare.
Advantages and Disadvantages#
Advantages
- Free with unlimited traffic
- WARP protocol is more low-level and has strong compatibility
Disadvantages
- Unable to choose nodes (free version)
- Not very fast
Prerequisites#
Please prepare:
- International credit card (VISA, MASTERCARD, etc.) or Paypal account
Cloudflare Zero Trust service itself is free, and payment information is only used for user verification.
Steps#
1. Register a Cloudflare account#
Visit the Cloudflare official website https://cloudflare.com, register an account, and complete email verification.

2. Initialize Zero Trust#
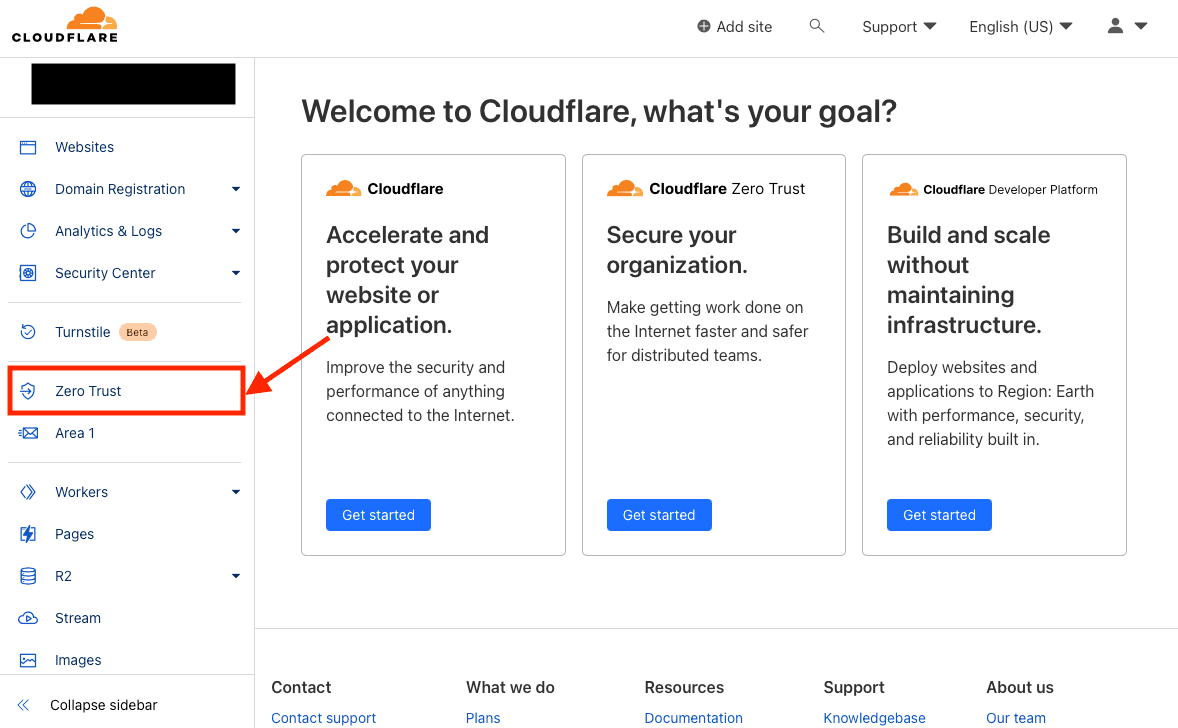
2.1 Access the Zero Trust management console#
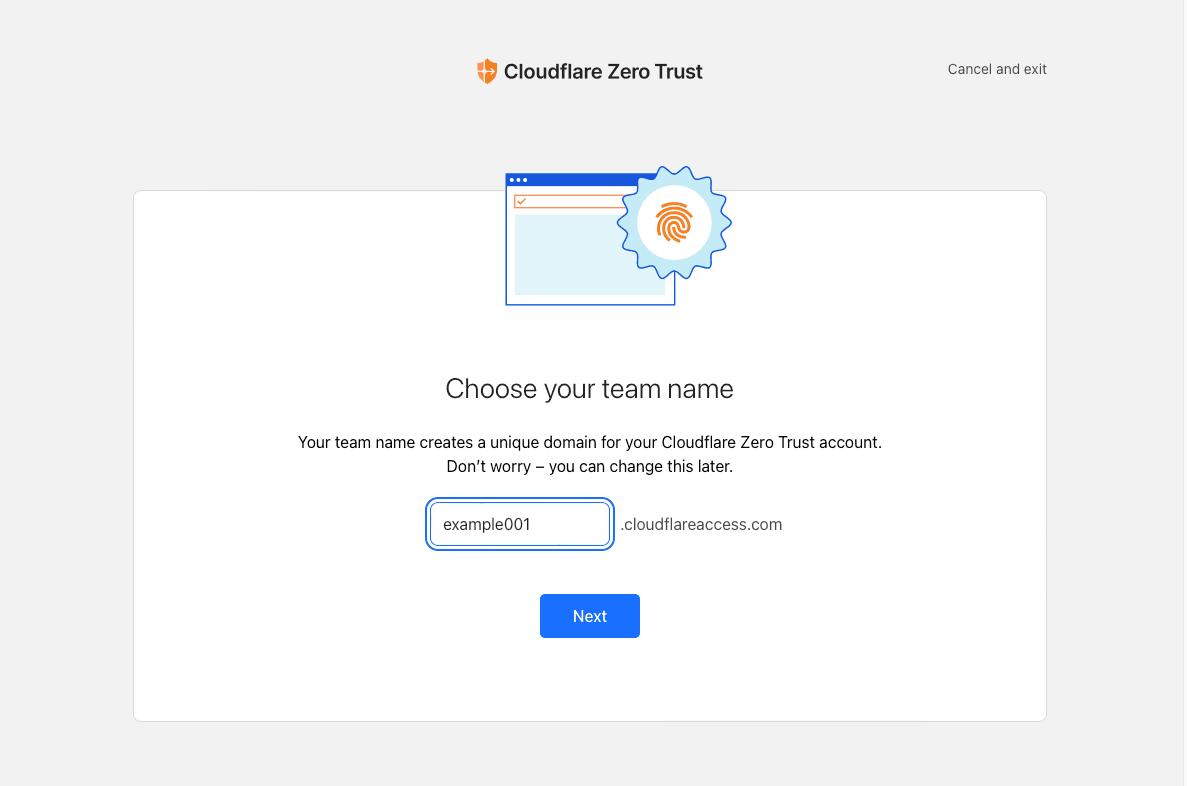
2.2 Initialize a team#
Choose a team name and remember it. Here, we use "example001" as an example.
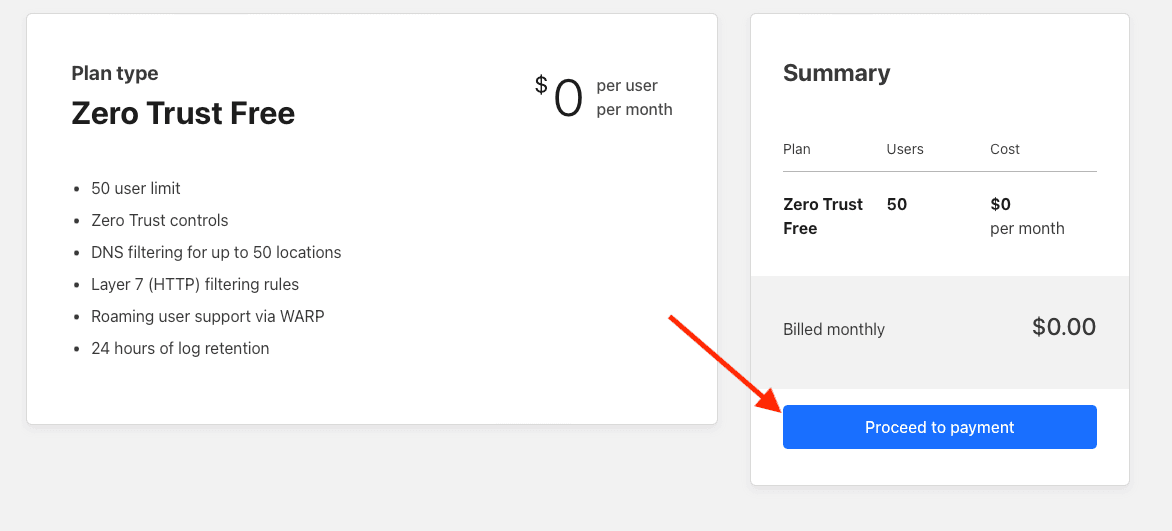
2.3 Choose the free plan and pay $0#

3. Configure Zero Trust#
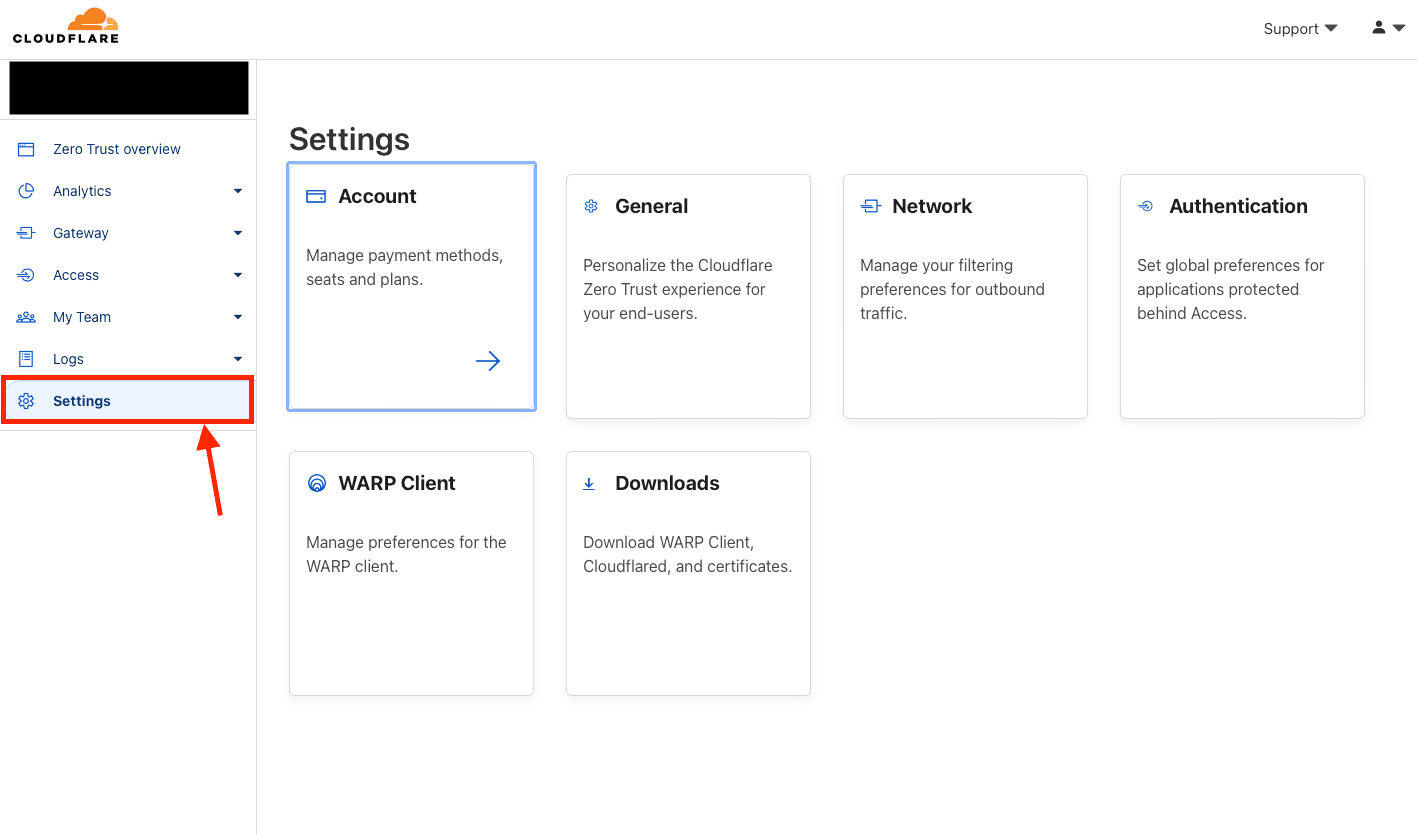
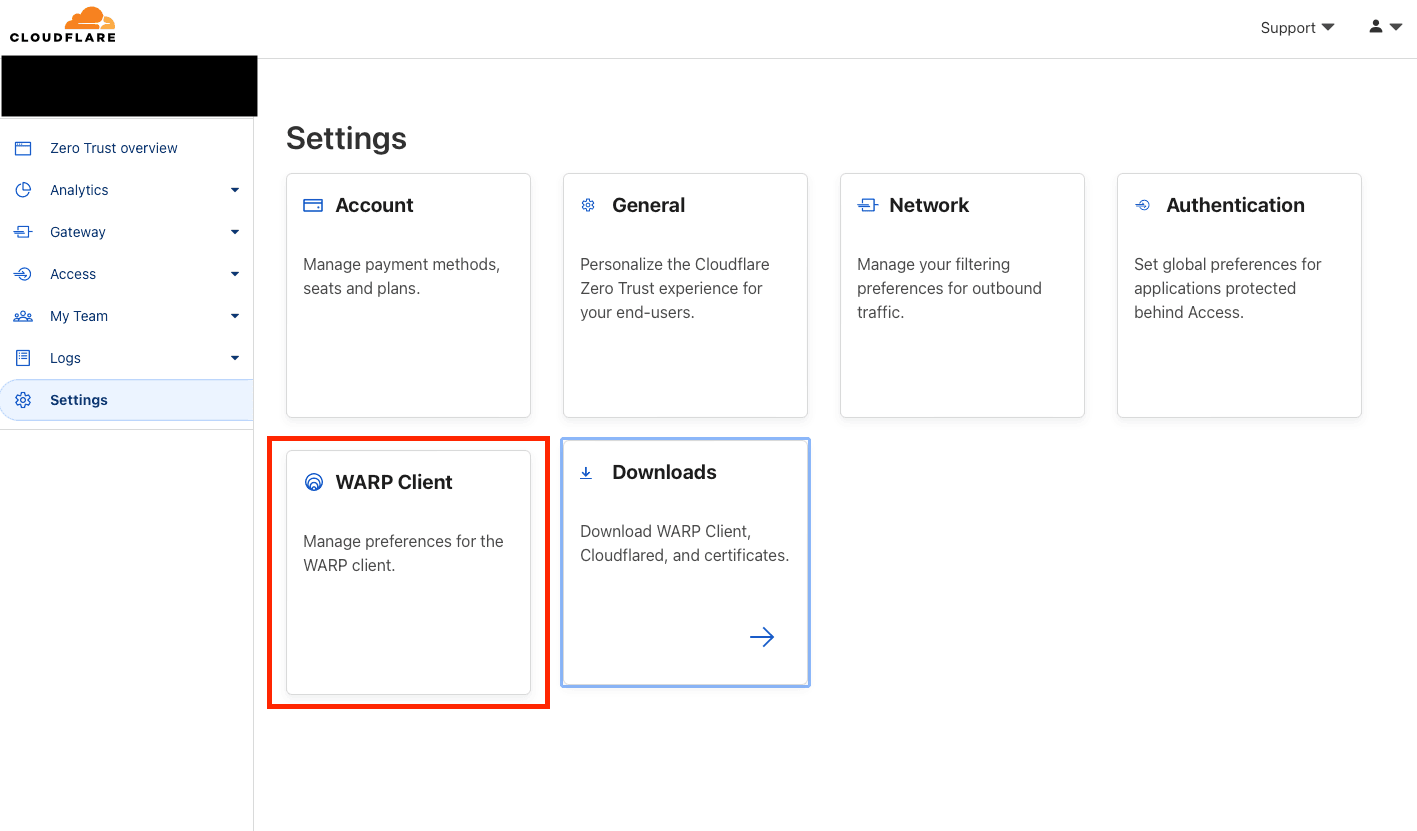
3.1 Access the Settings page#
3.2 Modify the Network settings#
3.2.1 Enable "Firewall -> Proxy" and check "UDP"#
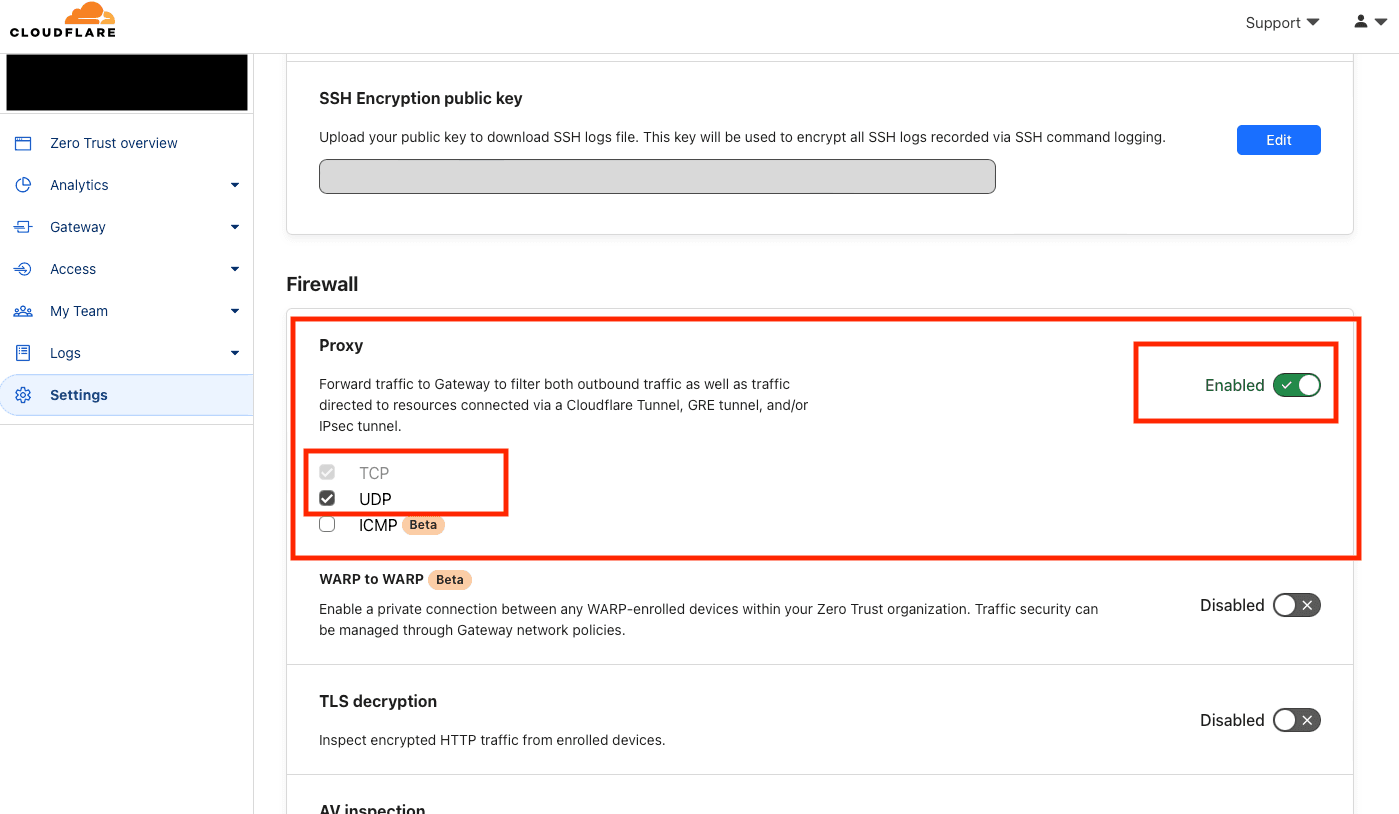
The above operation enables Cloudflare's own free exit gateway.
3.3 Modify WARP Client settings#
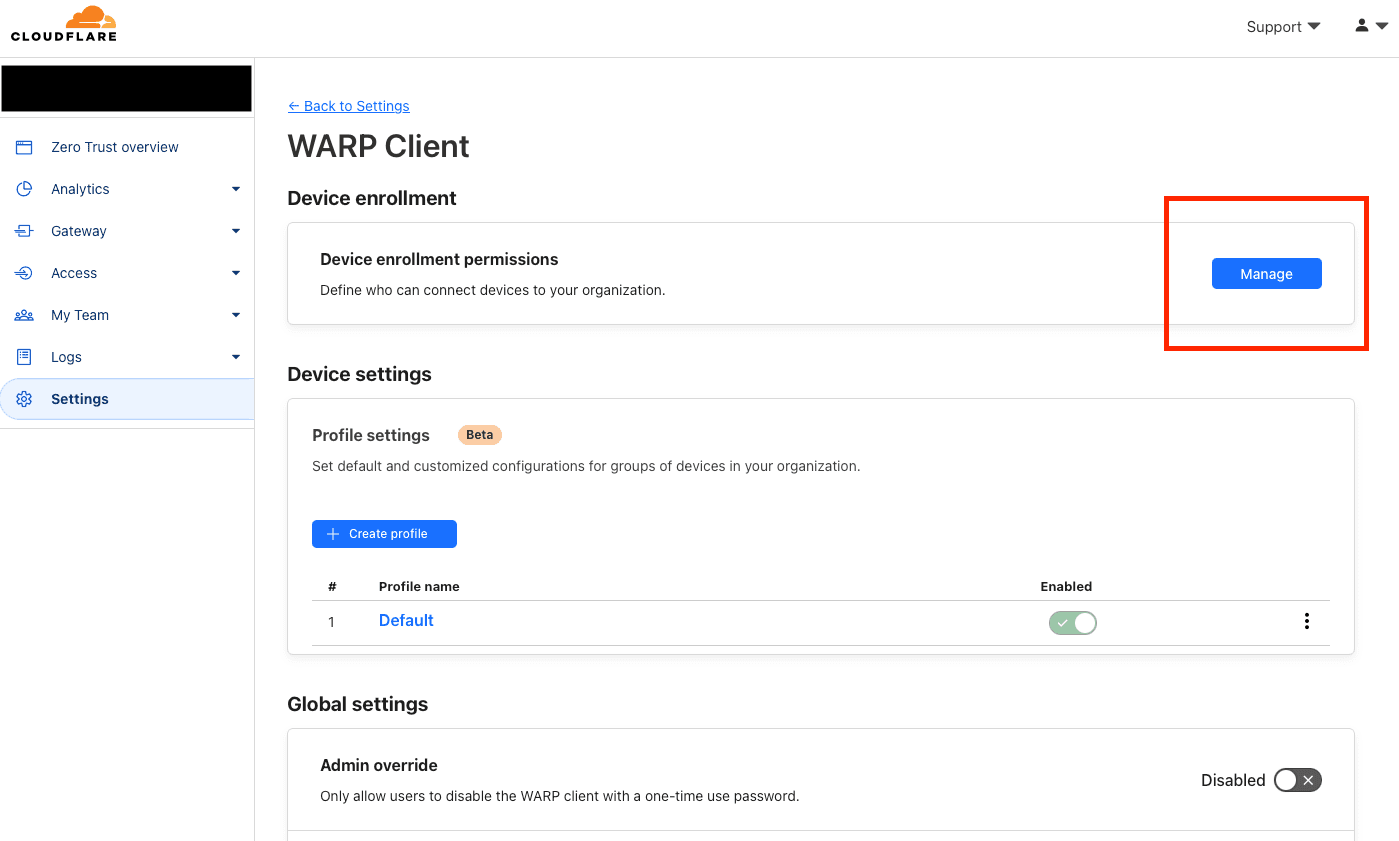
3.3.1 Modify Device enrollment permissions#
Add a rule
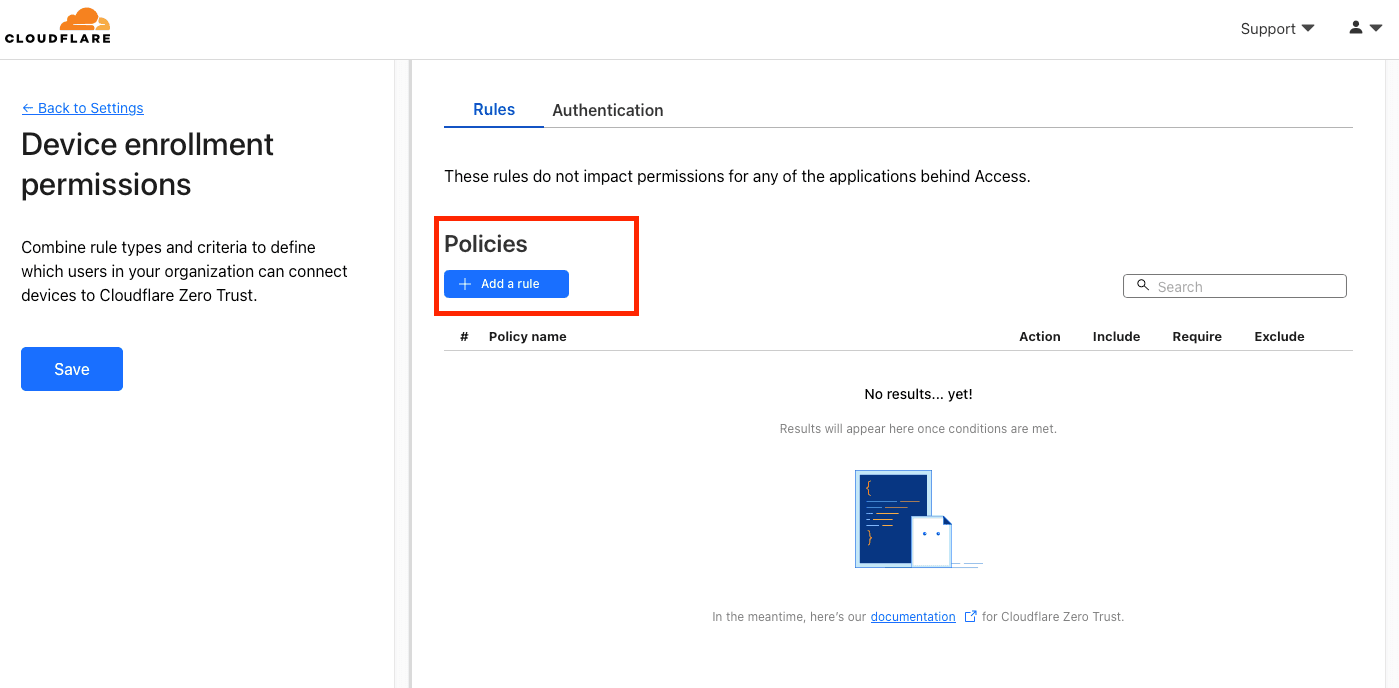
Fill in the following information:
- Rule name: Any name, for example, "default"
- Selector: Select "Emails"
- Value: Fill in your email address
After saving, return.
The above operation allows you to log in to your own team using your own email address.
3.3.2 Enable "Install CA to system certificate store"#

The above operation allows the WARP client to automatically install the required certificates.
4. Install and configure the client#
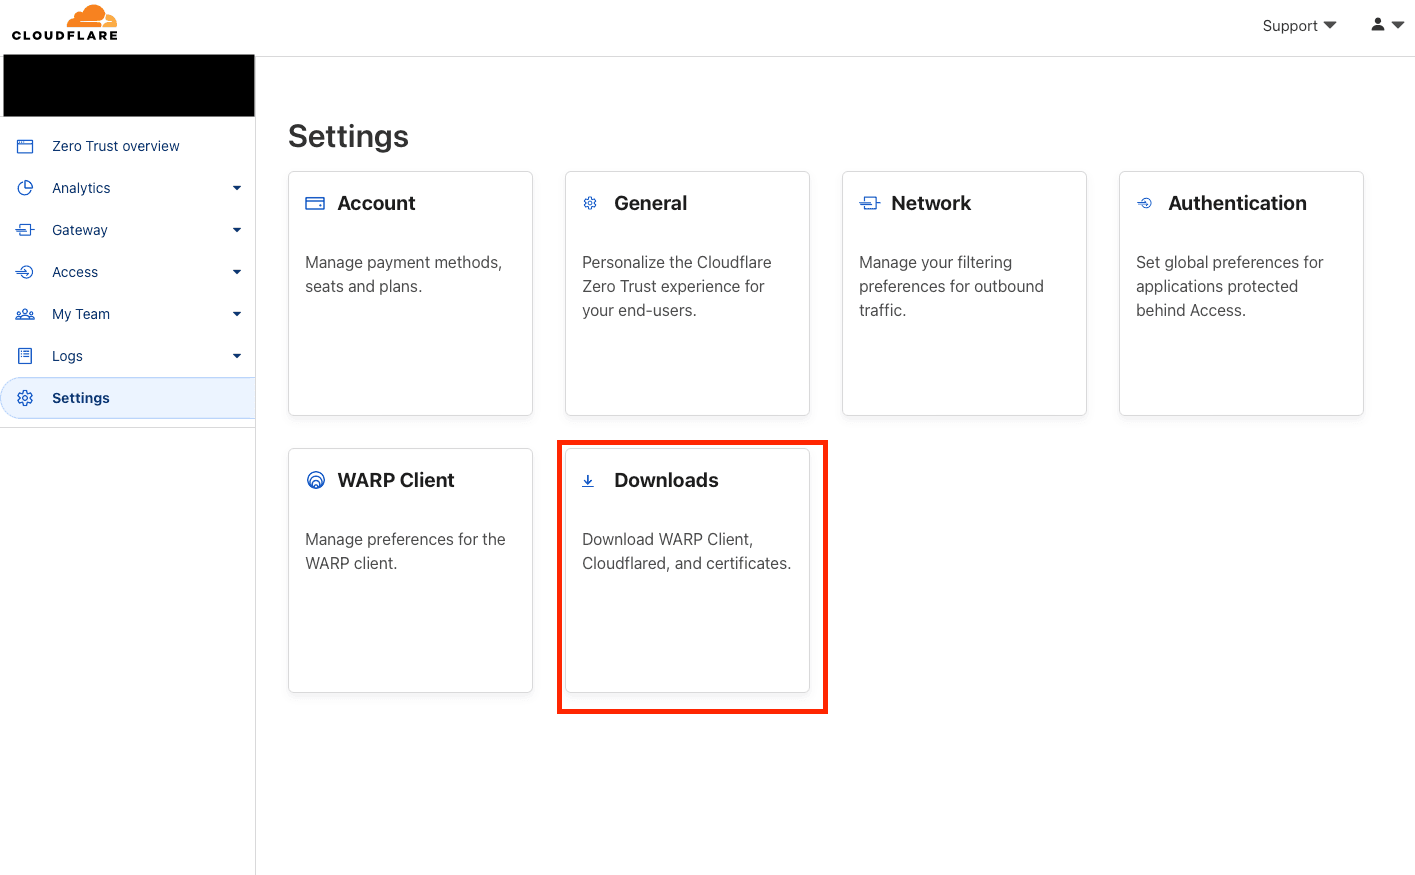
4.2 Find Downloads in Settings#
Download and install the WARP client.

4.3 Configure the WARP client#
After downloading the client on various platforms, go to Peferences -> Account and enter your team name (step 2.2), and verify login using the email address (step 3.3.1) in the pop-up page.
At this point, your computer can securely access the global internet through Cloudflare Zero Trust. Although the speed is not always fast, it is completely sufficient for daily use and can be used as a "backup machine".
JUST ENJOY IT!